
First get AI output working in LiveFaceSwap Desktop. Then send it directly to Zoom or Discord with LiveFaceSwap Camera, or pass it through OBS when you need scenes, overlays, or recording. LiveFaceSwap Camera is a virtual video device installed with Desktop, not a second application, and it carries video only—not microphone audio. This guide documents the Windows 11 workflow; LiveFaceSwap Desktop is also publicly available for Apple Silicon Macs running macOS 13 or later.
How the video reaches OBS, Zoom, or Discord
This guide covers the LiveFaceSwap Desktop virtual-camera setup.
- Using the browser for live preview does not by itself create LiveFaceSwap Camera in the Windows device list.
- Public Desktop downloads support Windows 11 and Apple Silicon Macs running macOS 13 or later.
- The menus, permissions, and troubleshooting steps below are Windows-specific and should not be copied directly to macOS.
The core video flow is:
Physical camera → LiveFaceSwap Desktop → LiveFaceSwap Camera → Receiving app
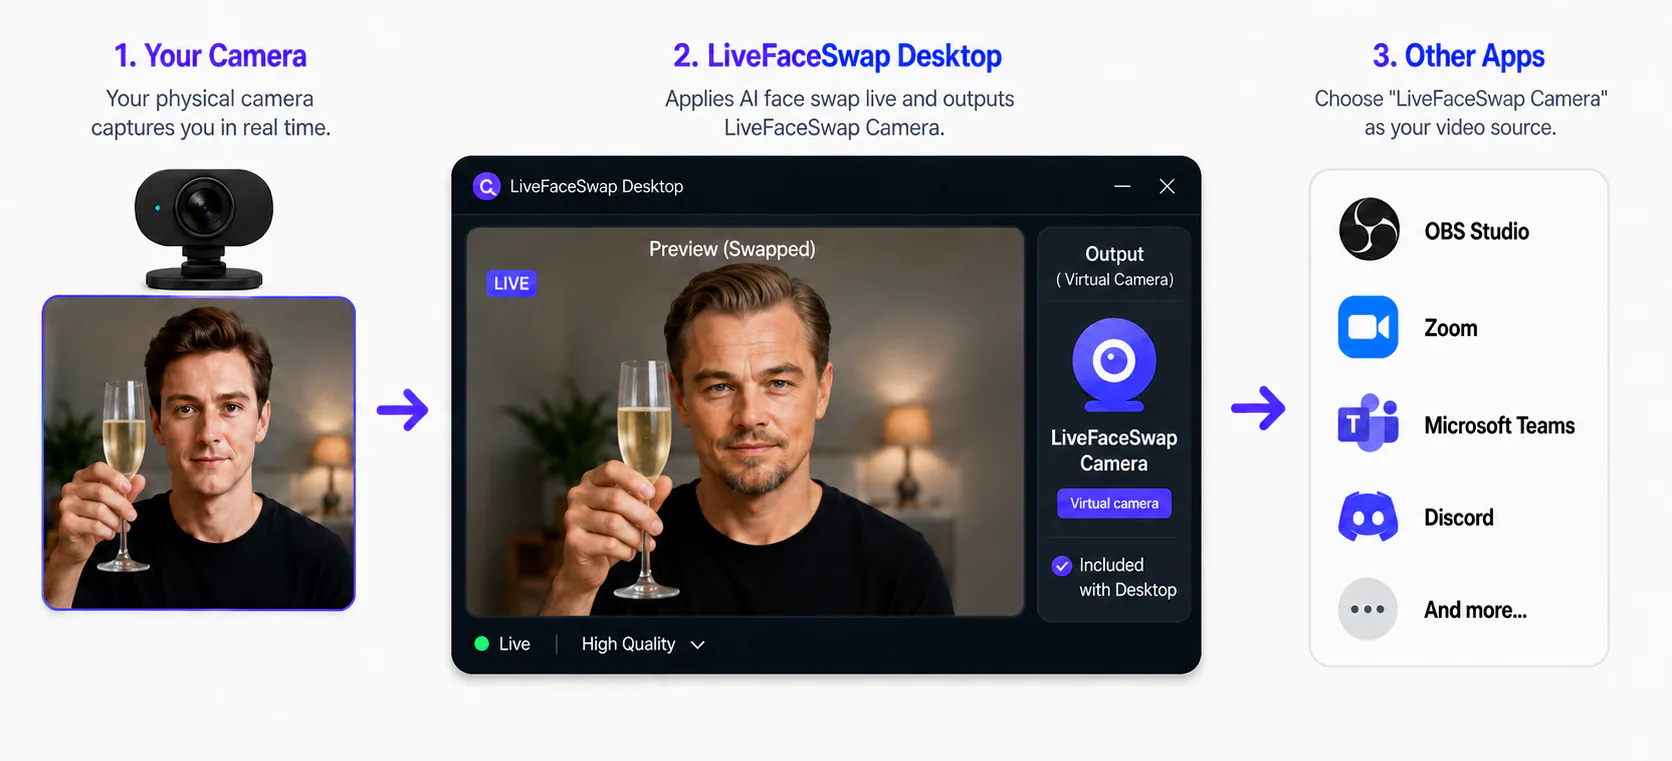
Here is what each part does:
- Physical camera supplies the original live video.
- LiveFaceSwap Desktop reads the input and shows the real-time AI output.
- LiveFaceSwap Camera publishes the processed result as a selectable Windows video device.
- OBS, Zoom, Discord, or another compatible app selects that device and receives the processed video.
LiveFaceSwap Camera is not a separate application that you open. The live session remains controlled in LiveFaceSwap Desktop; the receiving app only selects the video device that Desktop provides.
Verify LiveFaceSwap Desktop first
Do not start by repeatedly changing settings in OBS or a meeting app. First confirm that the two upstream stages already work in Desktop:
- Select the physical webcam under Input camera.
- Choose a reference portrait and start the face swap.
- Confirm that the physical camera preview continues to update.
- Confirm that AI output also updates continuously and shows the processed result.
Continue to the virtual-camera setup only after this check passes. It separates a camera or AI-session problem from a LiveFaceSwap Camera output problem.
If Desktop is not ready yet, complete the LiveFaceSwap Desktop setup guide first.
Choose a direct connection or route through OBS
Before selecting a camera in another app, decide whether you want a direct connection or an OBS setup.
Direct connection: use LiveFaceSwap Camera in the target app
If Zoom, Discord, or another call app only needs the processed camera feed, select LiveFaceSwap Camera directly:
Physical camera → LiveFaceSwap Desktop → LiveFaceSwap Camera → Zoom / Discord / another app
This is the simplest setup and does not require OBS first.
Use OBS for scenes, overlays, or recording
Use OBS in the middle when you also need overlays, screen capture, multiple video sources, scene switching, recording, streaming, or centralized audio timing:
Physical camera → LiveFaceSwap Desktop → LiveFaceSwap Camera → OBS
If another app must receive the complete OBS scene, continue with OBS's own virtual camera:
Physical camera → LiveFaceSwap Desktop → LiveFaceSwap Camera → OBS → OBS Virtual Camera → Receiving app
The two virtual-camera names have different jobs:
- LiveFaceSwap Camera: carries the processed LiveFaceSwap video into OBS or another receiving app.
- OBS Virtual Camera: carries the completed OBS scene onward to another app.
Inside OBS, select LiveFaceSwap Camera as an input. Select OBS Virtual Camera only in a downstream app that needs the completed OBS scene.
Select LiveFaceSwap Camera in the receiving app
After choosing the setup, open the camera or video-input settings in the receiving app and switch from the physical webcam to:
LiveFaceSwap Camera
Common setups are:
- OBS:
Sources → + → Video Capture Device → Device → LiveFaceSwap Camera. - Zoom: choose
LiveFaceSwap Camerafrom the camera list. - Discord: choose
LiveFaceSwap Camerain video settings.
After selecting it, move in front of the physical camera and compare the receiving app's preview with AI output in Desktop. The virtual-camera connection is working when both continue to show the same processed motion.
If the receiving app still shows the original face, it is usually still reading the physical webcam. The physical camera belongs under Input camera in Desktop; an app that should receive the processed result should select LiveFaceSwap Camera.
For app-specific menus, use the full OBS setup guide or Zoom setup guide.
Select and test microphone audio separately
LiveFaceSwap Camera provides video only. It does not include microphone audio.
Configure the two inputs separately in the final receiving app:
- Camera or video source:
LiveFaceSwap Camera; if you route through OBS and need the complete scene, use the corresponding OBS virtual-camera output instead. - Microphone or audio source: your physical microphone, headset, USB microphone, or audio interface.
After selecting the microphone, use the receiving app's microphone test or level meter to confirm that the intended input is actually responding.
If your setup is OBS → OBS Virtual Camera → Zoom / Discord, OBS Virtual Camera still carries video only. The downstream app still needs a separate microphone selection or another audio route that you have explicitly configured.
Video with no voice therefore does not mean LiveFaceSwap Camera is broken. Leave the correct video source selected and check the microphone setting separately.
Video and audio travel separately. If they are noticeably out of sync, test the exact setup you plan to use rather than copying a fixed delay from another system. When you need centralized audio-timing control, route the video through OBS and use the audio section of the LiveFaceSwap OBS guide.
Verify the full setup in four checks
Before a live call or stream, check only four layers:
- Input: Desktop shows the correct physical camera.
- Processing: Desktop's AI output is live and updating.
- Video: The final receiving app shows the processed feed and matches Desktop AI output.
- Audio: The final receiving app has the intended microphone selected and its test or level meter confirms input.
If one layer fails, troubleshoot that layer first. Do not change resolution, camera, microphone, mirroring, and network settings all at once, or it becomes difficult to identify the failing stage.
When you are finished, select Stop in LiveFaceSwap Desktop to end the live AI session. Closing Zoom or OBS does not by itself stop the Desktop session.
Troubleshoot common virtual-camera problems
LiveFaceSwap Camera is missing from the device list
Fully close and reopen the receiving app so it refreshes the camera list. Confirm that LiveFaceSwap Desktop is installed and that you are using the Windows 11 Desktop version covered by this guide.
If multiple apps cannot see the device, also check:
- whether Windows allows desktop apps to access camera devices;
- whether the LiveFaceSwap Desktop installation completed correctly;
- whether OBS, a meeting app, or a browser was using a camera while the virtual camera was being installed or updated.
If the device is still missing, update or reinstall Desktop only after these checks rather than repeatedly changing unrelated video settings in the receiving app. If it still does not recover, check App & updates for a newer version and use Open logs before contacting support.
The device is listed, but the preview is black or frozen
Return to Desktop and check Input camera first, then AI output:
- if either stage is already not updating, fix the camera input or AI output in Desktop first;
- if both work, reselect
LiveFaceSwap Camerain the receiving app; - temporarily close other apps that are using camera devices to rule out a device conflict.
The receiving app shows the original face
The app is probably reading the physical webcam. Change its camera source to LiveFaceSwap Camera, then compare the preview with Desktop's AI output.
Video works, but there is no sound
Keep the correct video source selected, then choose the microphone separately in the receiving app and confirm that its microphone test or level meter responds.
Audio and video do not line up
Test the exact setup you plan to use rather than applying a fixed delay value. When you need centralized timing control, route the feed through OBS and follow the OBS guide's audio setup.
A downstream app does not show the complete OBS scene
Check which camera that downstream app selected. If it still uses LiveFaceSwap Camera, it will receive only the processed LiveFaceSwap feed. To send the complete OBS scene, start OBS's virtual-camera output and select OBS Virtual Camera in the downstream app.