
To use real-time face swap on Zoom, first get AI output working in LiveFaceSwap Desktop, then select LiveFaceSwap Camera in Zoom. OBS is not required for this direct setup, and the microphone is selected separately in Zoom. If Zoom still uses the physical webcam, it will show the original video instead.
The video flow is:
Physical camera → LiveFaceSwap Desktop → LiveFaceSwap Camera → Zoom
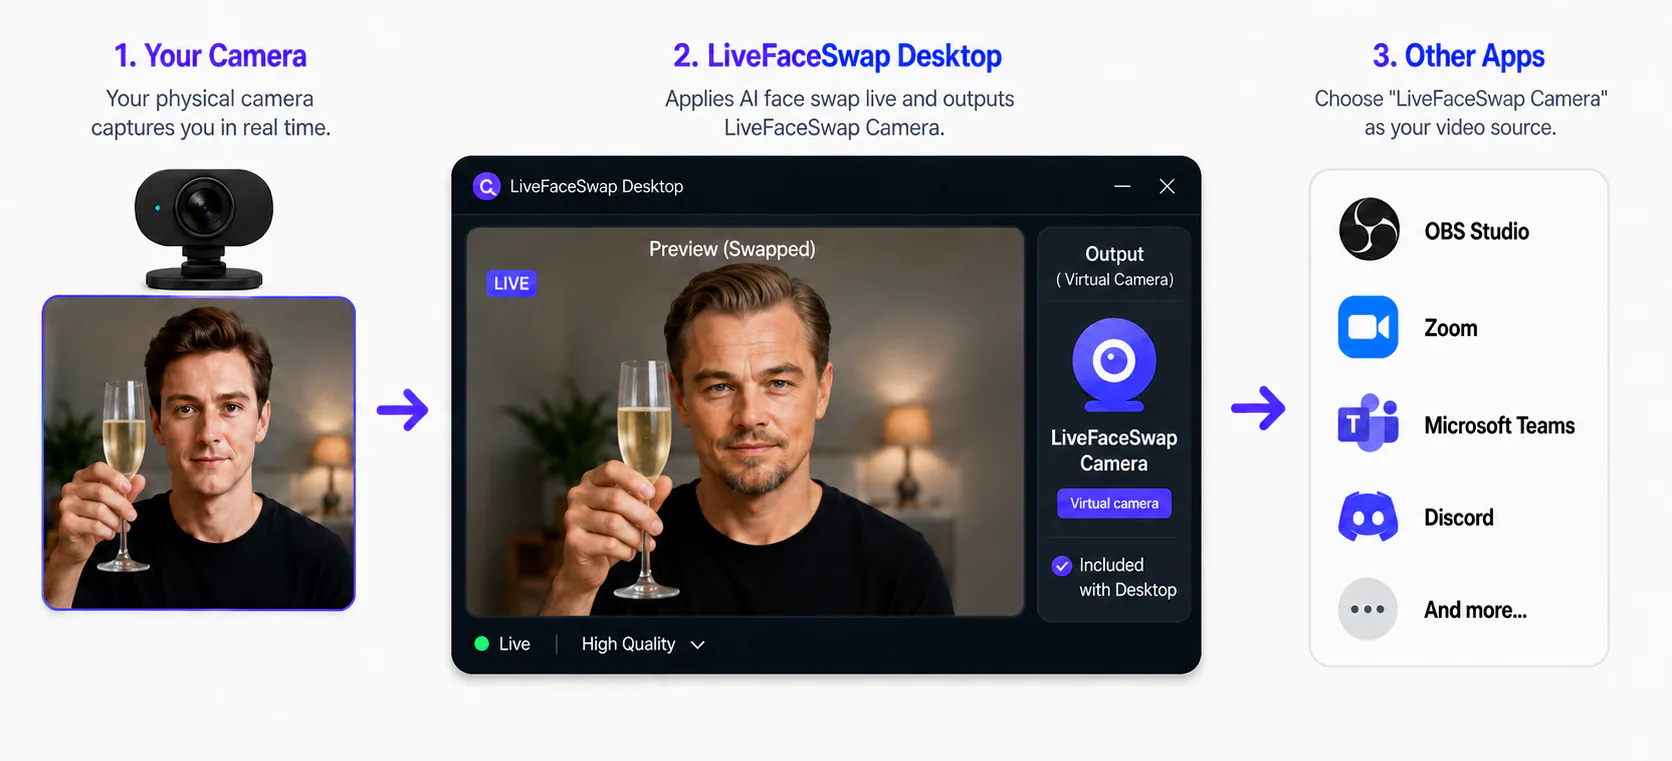
Confirm two things before you start
First, LiveFaceSwap Desktop should already be installed on Windows 11 and able to display your physical camera. Second, the Zoom desktop app should already be able to use your normal camera and microphone.
If Desktop is not ready yet, complete the LiveFaceSwap Desktop setup guide first. Get AI output working before troubleshooting Zoom; that makes it much easier to tell whether the problem is in Desktop or Zoom.
Step 1: Get the live face swap working in Desktop
Open LiveFaceSwap Desktop:
- Select your physical camera under Input camera.
- Add or choose a reference portrait.
- Under Effect, select Face Swap, choose the model you want, and review its displayed credit rate.
- Select Start Face Swap.
- Wait until AI output shows continuously updating processed video.
The success check is simple: when you move or change expression in front of the camera, Desktop AI output should keep updating. Continue to Zoom only after this stage is working.
Step 2: Select LiveFaceSwap Camera in Zoom
Open the Zoom desktop app and go to:
Settings → Video & effects → Camera
From the camera list, select:
LiveFaceSwap Camera
The Zoom preview should now show the same processed video you see under AI output in LiveFaceSwap Desktop. If you are already in a meeting, open the arrow next to Start Video or Stop Video, then choose LiveFaceSwap Camera under Select a Camera.
If Zoom shows your original webcam, the wrong device is selected. Zoom should read LiveFaceSwap Camera; the physical camera belongs under Input camera in LiveFaceSwap Desktop.
Step 3: Select your microphone separately in Zoom
LiveFaceSwap Camera is a video device. It does not carry microphone audio, so camera and audio are configured separately.
Open:
Settings → Audio
Choose the microphone and speaker you normally use. A typical setup is:
- Camera:
LiveFaceSwap Camera - Microphone: laptop, USB, headset, or audio-interface microphone
- Speaker: headphones or speakers
Before joining an important call, use Zoom's built-in microphone and speaker tests to verify input and playback. This keeps an audio problem from being mistaken for a virtual-camera problem.
Step 4: Verify the setup in a test meeting
Before using the setup in a real meeting, start or join a test meeting and confirm four things:
- Desktop AI output continues to update;
- the Zoom preview shows the processed feed rather than the physical webcam;
- head movement and expressions continue to update in Zoom;
- the microphone test records and plays back audio correctly.
Once these checks pass, the Zoom setup is ready. Keep LiveFaceSwap Desktop running; Zoom only needs to receive video from LiveFaceSwap Camera and audio from the microphone you selected separately.
What if Zoom cannot find LiveFaceSwap Camera?
Check in this order:
- Fully quit Zoom.
- Open LiveFaceSwap Desktop and confirm that AI output works.
- Reopen Zoom and check the camera list again.
- If it is still missing, confirm that Windows allows desktop apps to access camera devices.
- In a meeting, also check the arrow next to Start Video or Stop Video and open Select a Camera.
If Zoom was already open when LiveFaceSwap Camera was installed, fully quit and reopen Zoom so it can refresh the camera list. Reinstall LiveFaceSwap only if the earlier checks show that the virtual camera itself is not registered correctly.
If you need to isolate whether the problem is the virtual video device, the physical camera, or the separate microphone path, use the LiveFaceSwap Camera and audio guide.
What if LiveFaceSwap Camera is selectable but the Zoom preview is black?
Look at AI output in LiveFaceSwap Desktop first:
- AI output is also black, frozen, or not updating: the problem is with the physical camera or AI session. Fix Desktop before troubleshooting Zoom.
- AI output works, but Zoom is black: keep Desktop running, reselect
LiveFaceSwap Camera, and restart Zoom if the preview still does not recover. - Zoom shows the original webcam: switch the selected video device to
LiveFaceSwap Camera.
Check one part at a time instead of changing resolution, mirroring, HD, and camera permissions all at once.
Why does the Zoom preview look mirrored?
Zoom's Mirror my video preview primarily affects the preview you see yourself, so your own preview alone is not enough to determine what other participants receive.
If text or logos look reversed, inspect LiveFaceSwap Desktop AI output first and then the Zoom mirror setting. Avoid flipping the video in multiple apps because two horizontal flips can cancel each other and make the actual output direction harder to judge. Zoom documents its current camera, HD, original-ratio, and mirror controls in the Zoom Workplace settings guide.
What if the video is delayed or the call is unstable?
The real-time AI video is processed in the cloud before it reaches Zoom, so it adds a network-processing step that a normal webcam does not have. Microphone audio still goes directly through Zoom. If video delay or instability increases, check these first:
- whether the network connection is stable;
- whether another app is using the camera or consuming significant system resources;
- whether AI output in LiveFaceSwap Desktop remains stable;
- if CPU or bandwidth is tight, test with Zoom HD disabled and compare the result.
If you also need precise audio timing, titles, screen capture, or multiple visual sources, then OBS can be useful in the middle. For a normal face-swapped video call, OBS is not required; selecting LiveFaceSwap Camera directly in Zoom is the simpler setup. For more complex scenes, continue with the LiveFaceSwap OBS guide.