
This guide shows you how to record a live face swap in LiveFaceSwap Desktop, replay it in History, and export an MP4. Use version 0.2.19 or later and check that Auto-record is on before you start a session. Recording begins when the first AI frame appears. After the session ends and the video finishes saving, you can export the entire recording directly or trim a clip first.
Recording, replaying, and exporting do not cost extra credits. The live AI session is still billed at the normal rate for your chosen model. Recordings stay on your computer, while the face swap itself is processed in the cloud. Opening History does not start another AI session.
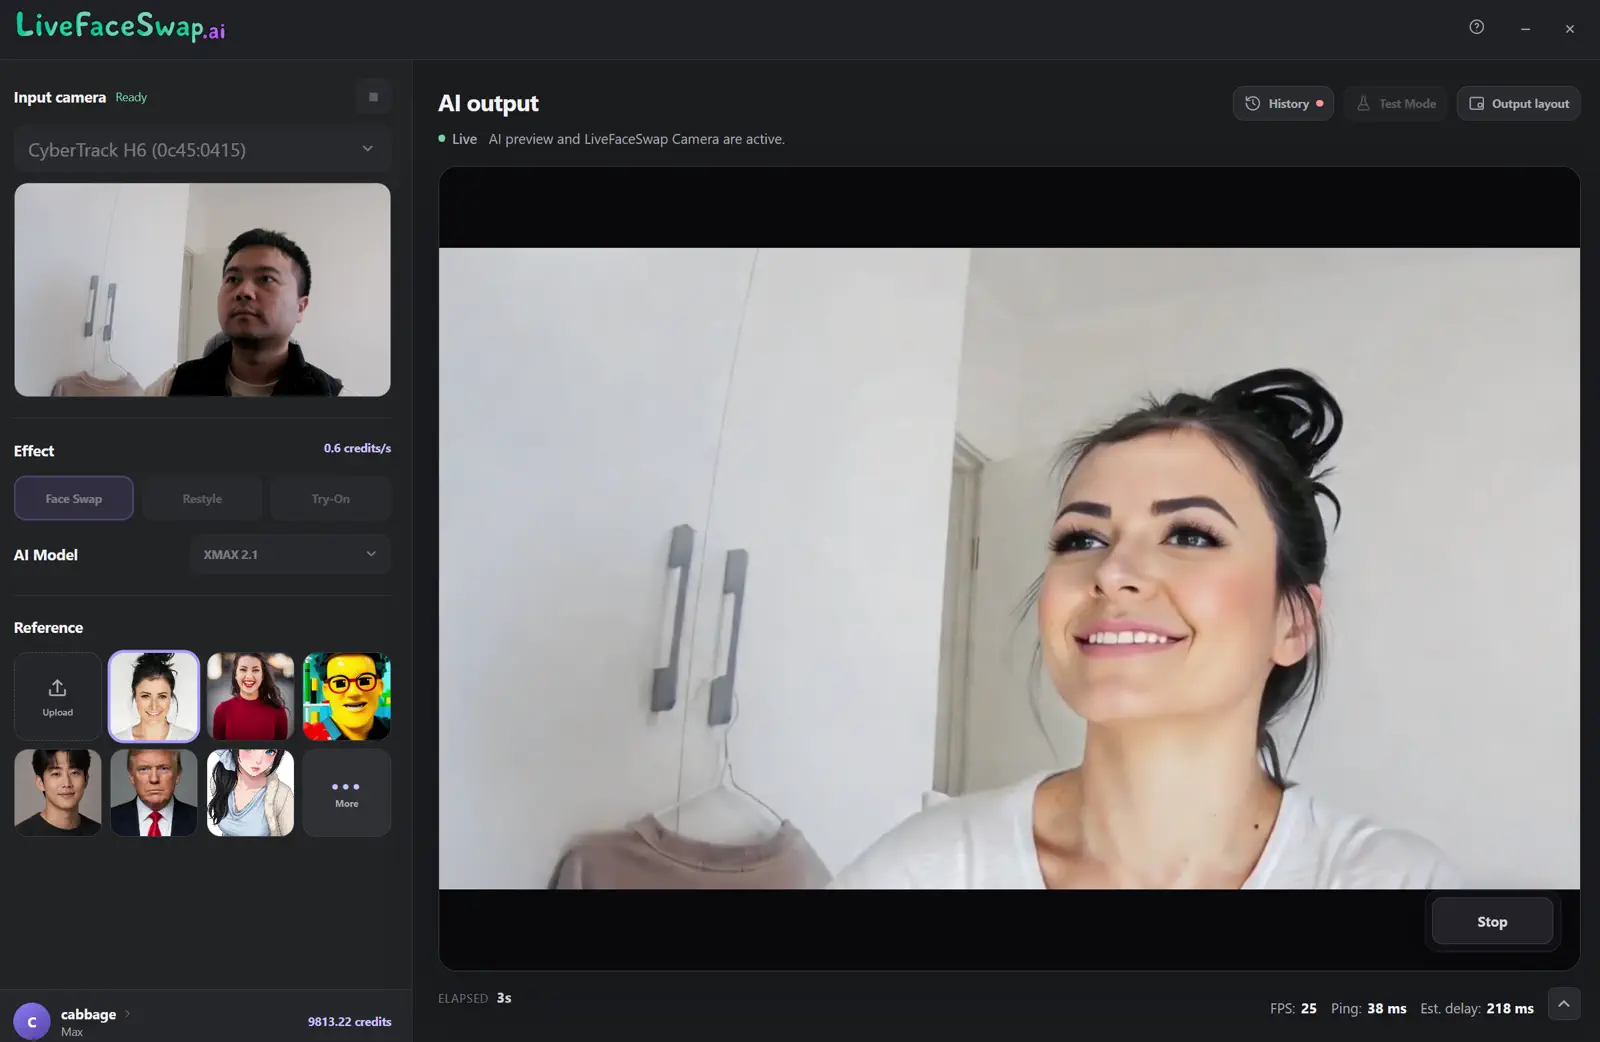
1. Check Auto-record before the session
Open History to find Auto-record in the upper right. It is on by default, and the app remembers if you turn it off. With Auto-record enabled, recording begins when the session actually produces its first AI frame, so the time spent waiting for a connection is not saved as an empty video. Set Auto-record before you start the session; you cannot start or pause a separate recording while a session is running. After you stop the live face swap, the app finishes saving in the background without forcing open a preview window.
Turning off Auto-record does not affect the live face swap. That session can still appear in History with a thumbnail, time, and duration, but it will not have a video to play or export. If the session never produces an AI frame, it will not create a History entry.
2. Replay the recording in History
History sits above the AI output, next to Test Mode. Its list shows session thumbnails and durations, with filters for today, the last seven days, or all entries. Select an entry to play its video on the right. You can check the result there without exporting it first or opening another player. History reads the original recording saved on your computer, so you can come back and watch it after restarting the app. To locate the files, click Open original files. There is currently no delete button in History; you can manage recording files in your system's file manager.
If a session is interrupted after AI output begins, History may retain the footage recorded so far and mark the entry Incomplete.
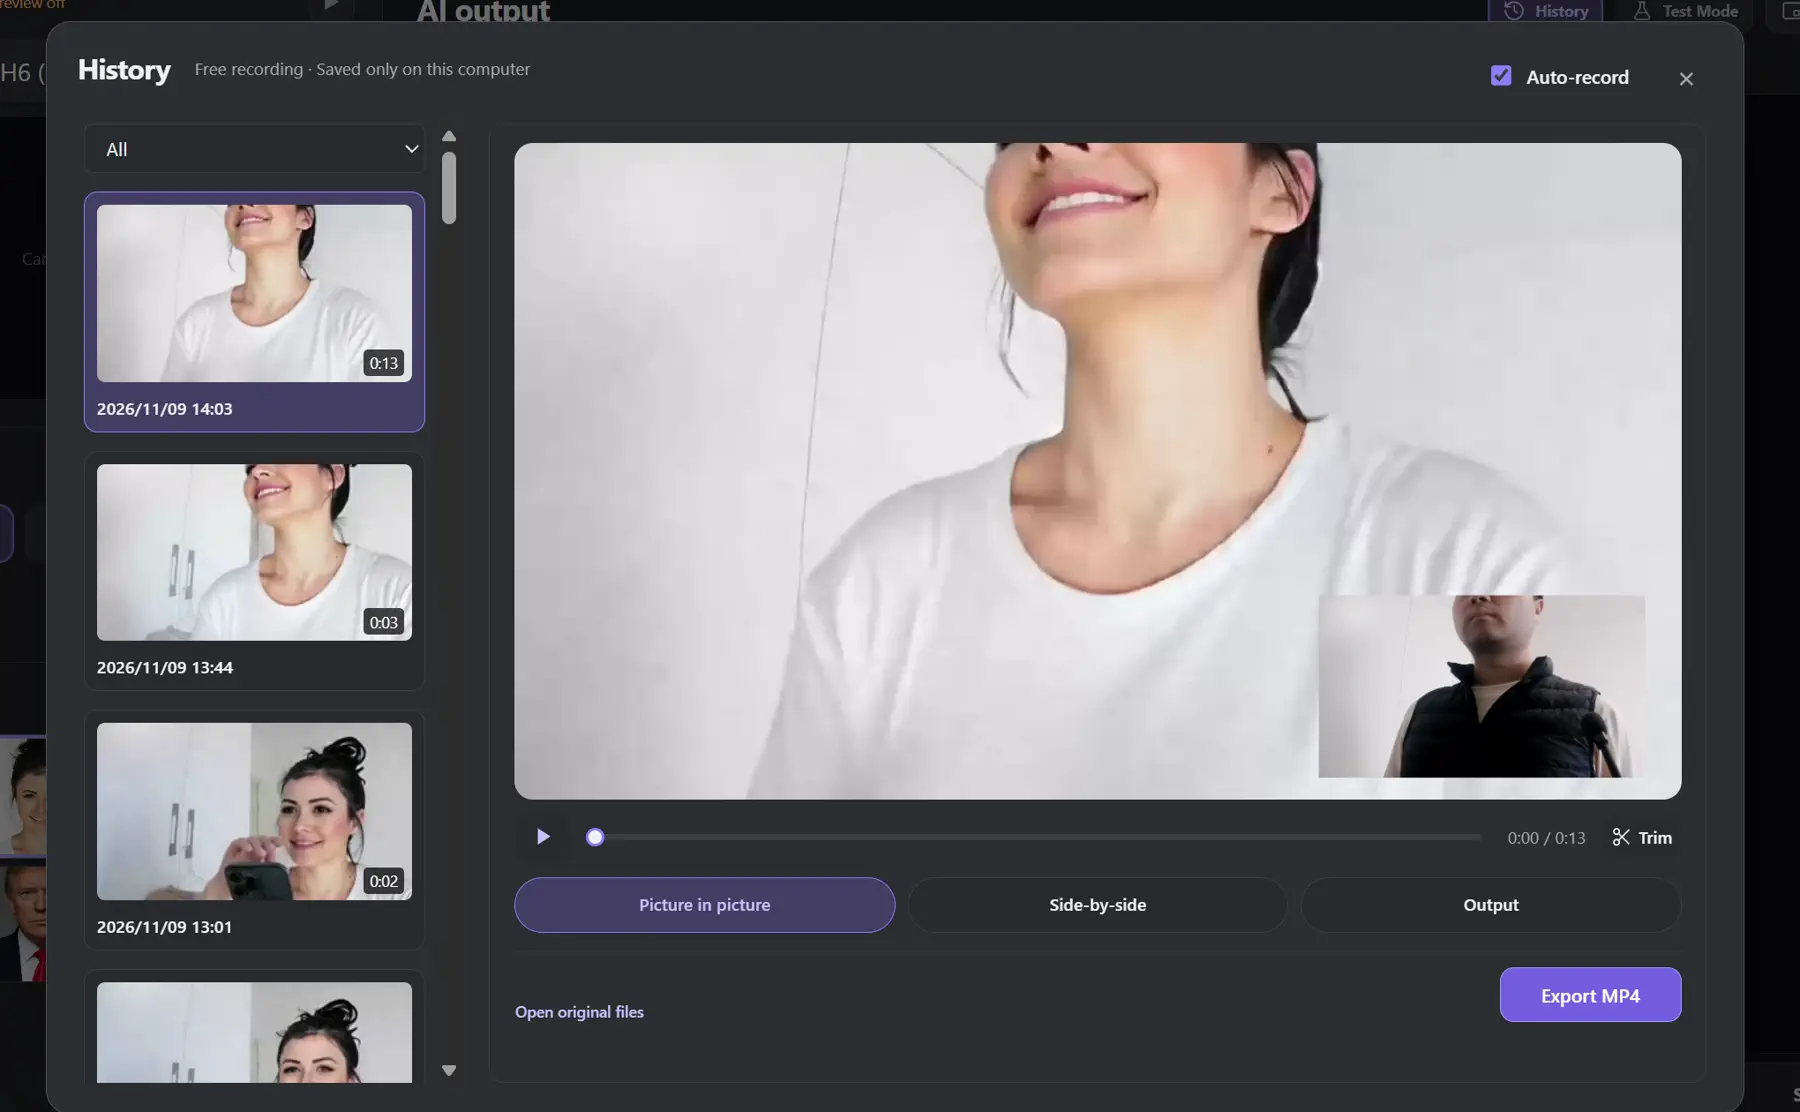
3. Choose a preview layout
The desktop app saves the original camera feed and the processed AI output separately. In History, you can switch between three ways to view them:
- Picture in picture puts the AI output first, with the original camera feed in a corner.
- Side-by-side places the original and AI views together so you can compare movement and expressions.
- Output shows only the AI result, which is useful when checking what you plan to share.
Changing the preview layout does not rewrite the original recording. You can compare the views before choosing one to export.
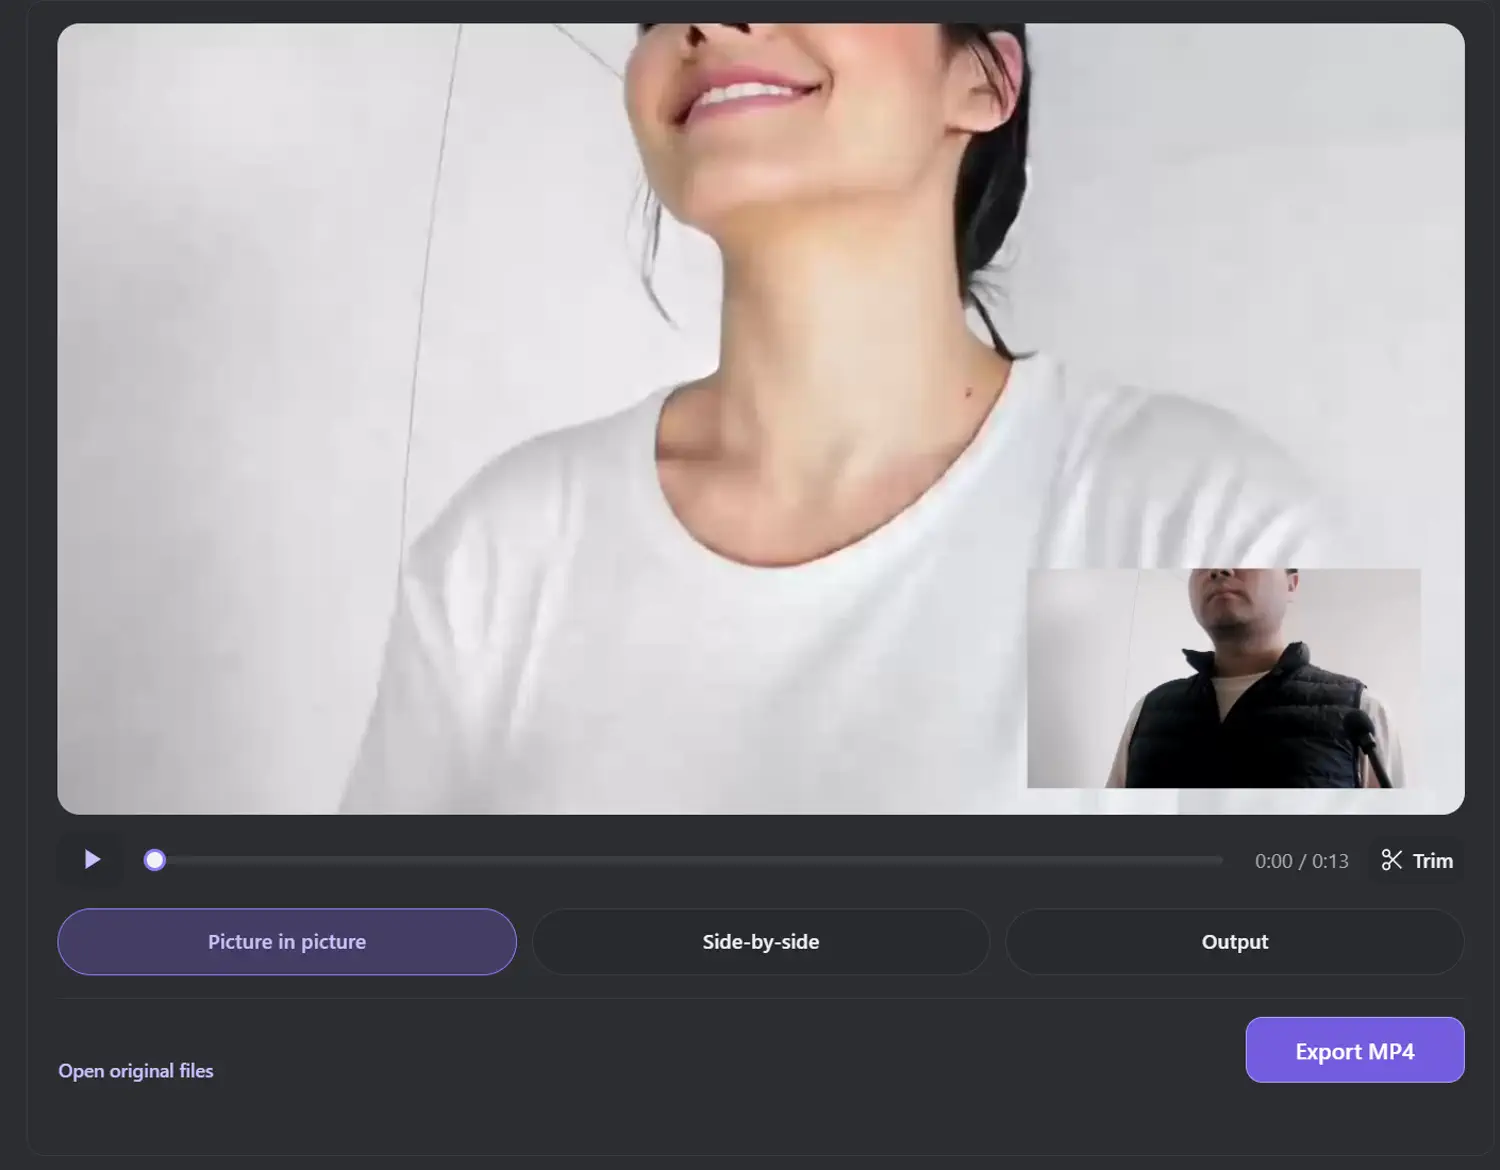
4. Export the full video or trim a clip
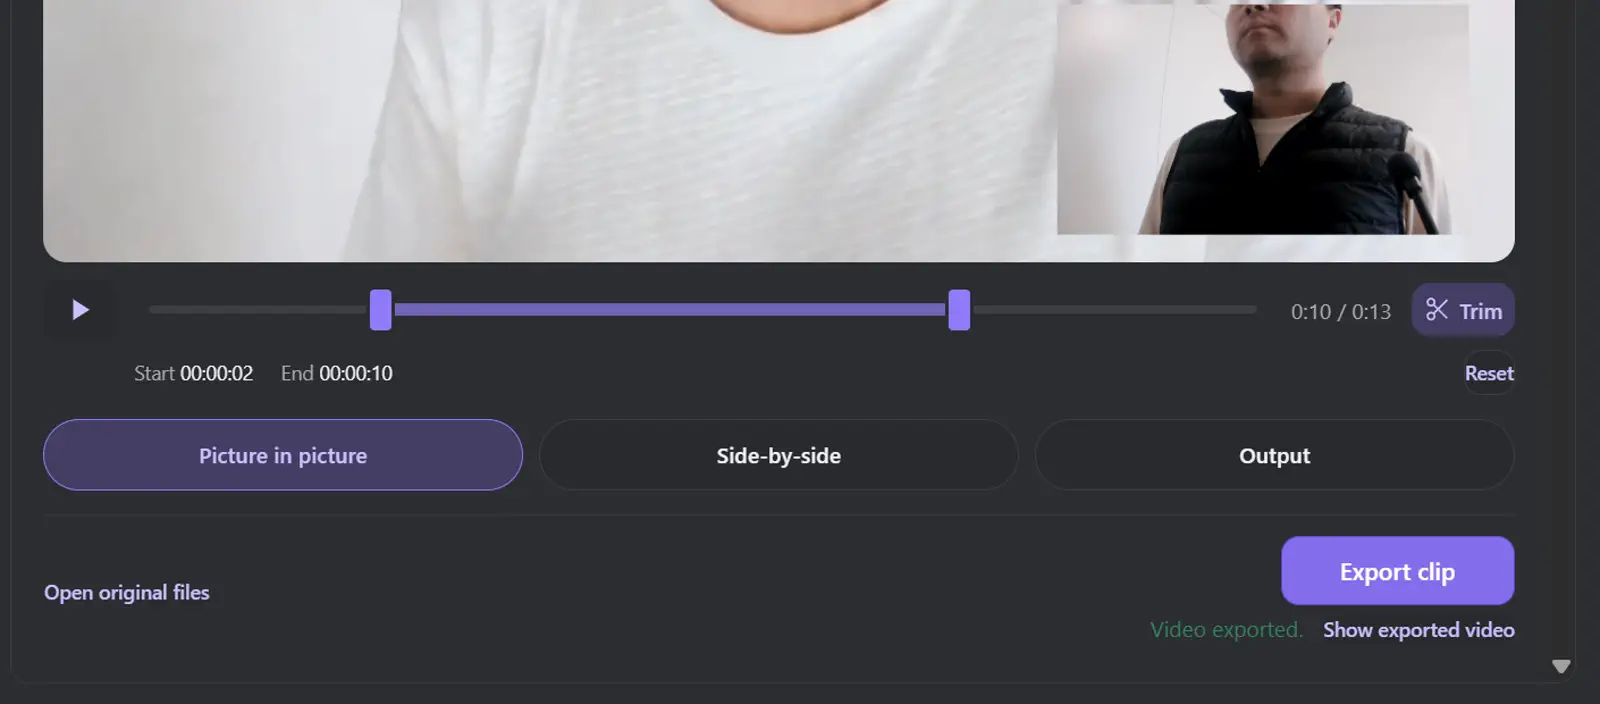
After previewing, click Export MP4 to save the entire recording in the selected layout. You do not need to trim it first. If you only want part of the video, click Trim and drag the handles at either end of the timeline to set the start and end. The preview then plays the selected section, and the button changes to Export clip. Click Reset to restore the full recording and bring back Export MP4.
Exporting creates a separate MP4; it does not replace the original recording in History. The exported file goes into LiveFaceSwap Recordings/Exports under your system's Videos folder. When it is ready, click Show exported video to find it. The original stays available if you want to export another layout or trim a different clip later.
Version requirements and recording limits
Built-in recording is available in LiveFaceSwap Desktop 0.2.19 for Windows 10/11 and Apple Silicon Macs. The screenshots here show the Windows app. If you have not installed it yet, see the Windows 10/11 setup and live face swap guide. The browser version is still centered on live preview and does not have these History recording and export controls.
Recordings do not include microphone audio or the desktop app's buttons and statistics panel. If you need sound, captions, or other scene elements in the finished video, you can set those up separately with the LiveFaceSwap OBS guide. Before recording, make sure you have permission to use the people and reference images in your video.
Each recording currently has a default limit of 10 minutes. At that point, the footage already captured is saved to History. The live AI session does not stop automatically, but it will not start a second recording during that same session. You can record again in your next session. If you need to install or update the app, get it from the LiveFaceSwap Desktop page.