
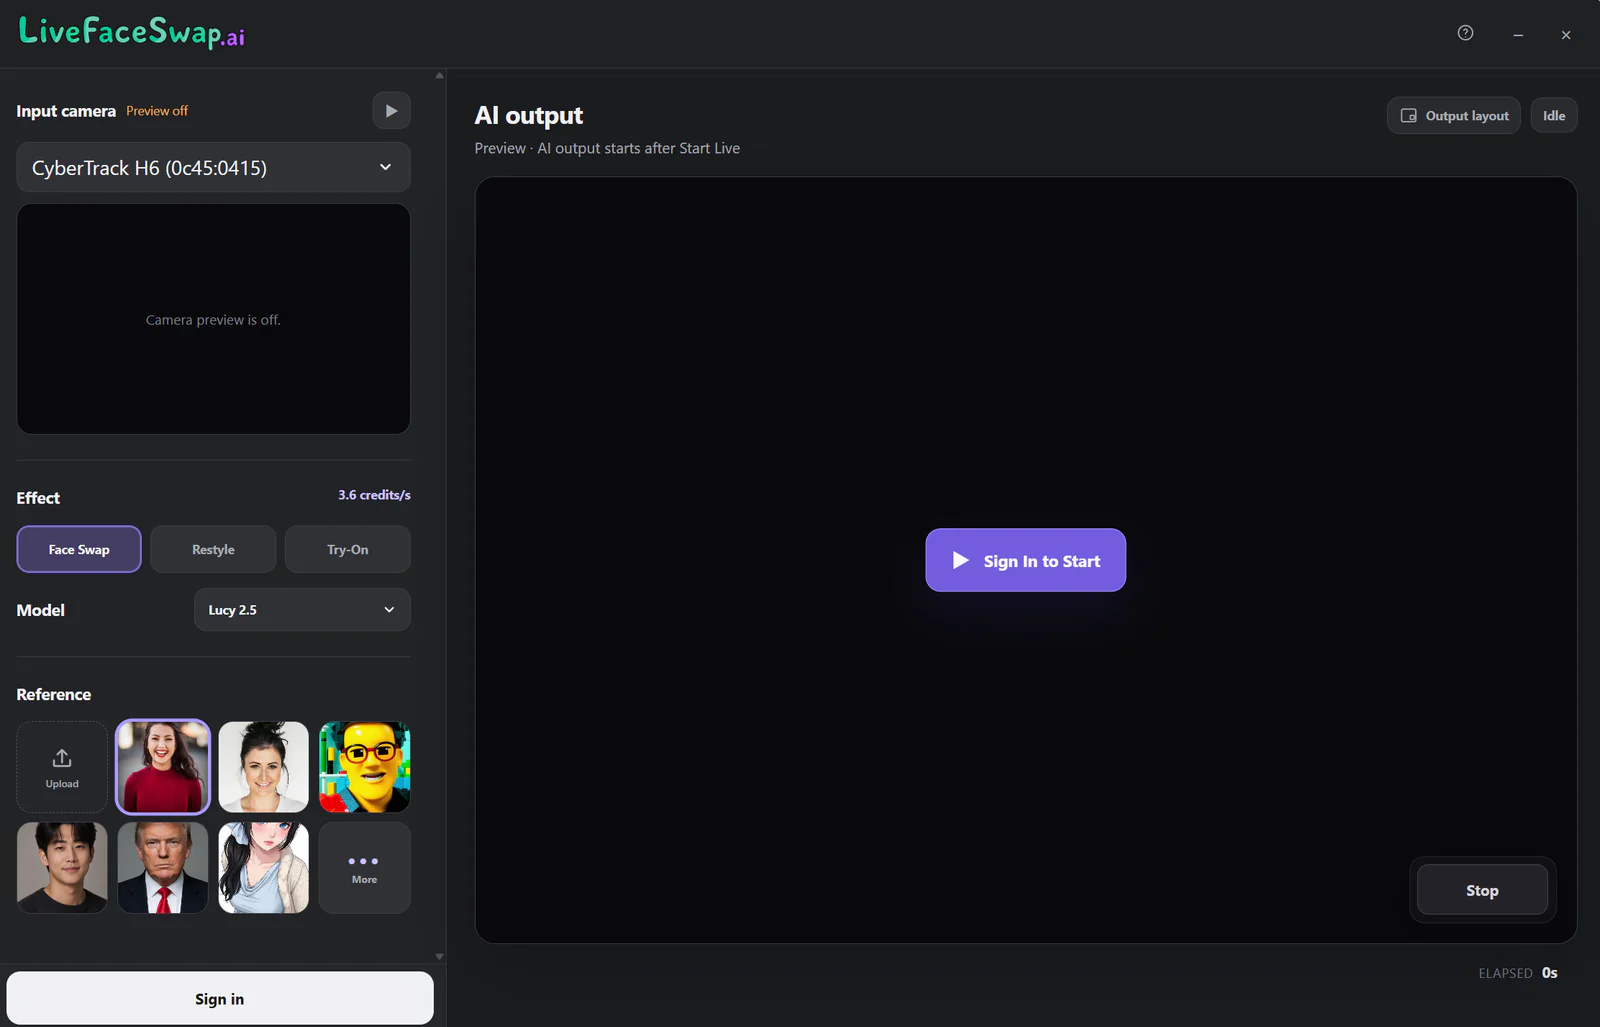
This guide shows you how to install and use LiveFaceSwap Desktop on Windows 11 and complete your first real-time AI face swap. You will go from installing the app and selecting a camera to adding a reference image, clicking Start Face Swap, and seeing the live AI output.
If you only want to try real-time face swapping in your browser, you can use the LiveFaceSwap online workspace without installing the desktop app.
If you want to use the processed face-swap video for streaming or recording in OBS, complete this guide first and then read How to Use LiveFaceSwap with OBS.
Before You Begin
Before using LiveFaceSwap Desktop for Windows, make sure:
- Your computer runs Windows 11
- Your camera works correctly
- You have a stable internet connection
- You do not need a dedicated GPU or high-end graphics card
If you need to use LiveFaceSwap on Windows 10 or an earlier version, contact support@livefaceswap.ai.
LiveFaceSwap Desktop captures video from your physical camera and sends it to a real-time AI processing session. You can preview the processed video in the app or later route it through the virtual camera to OBS, Zoom, or other video software.
1. Download and Install LiveFaceSwap Desktop
Go to the LiveFaceSwap Desktop download page and download the Windows installer.
Run the installer. If Windows displays a User Account Control (UAC) prompt, approve it to continue the installation.
During installation, LiveFaceSwap also registers a virtual camera named LiveFaceSwap Camera. This device sends the AI-processed video from LiveFaceSwap to OBS or other software that accepts camera input.
You do not need to configure the virtual camera for your first face-swap test. Start by confirming that LiveFaceSwap Desktop can display both your camera feed and the AI output.
2. Open the App and Check Your Camera Input
Open LiveFaceSwap Desktop after installation.
The app will try to display the feed from your current camera. First, make sure you can see a normal video feed in the input preview on the left.
If your computer has more than one camera, use Input camera to select the source device, such as:
- Your laptop's built-in camera
- A connected USB camera
- Another video input device recognized by Windows
Here, Input camera means the physical camera that provides the original video.
Before starting a face swap, make sure the camera preview is stable, correctly oriented, and not being used by another app.
3. Sign In to the Desktop App
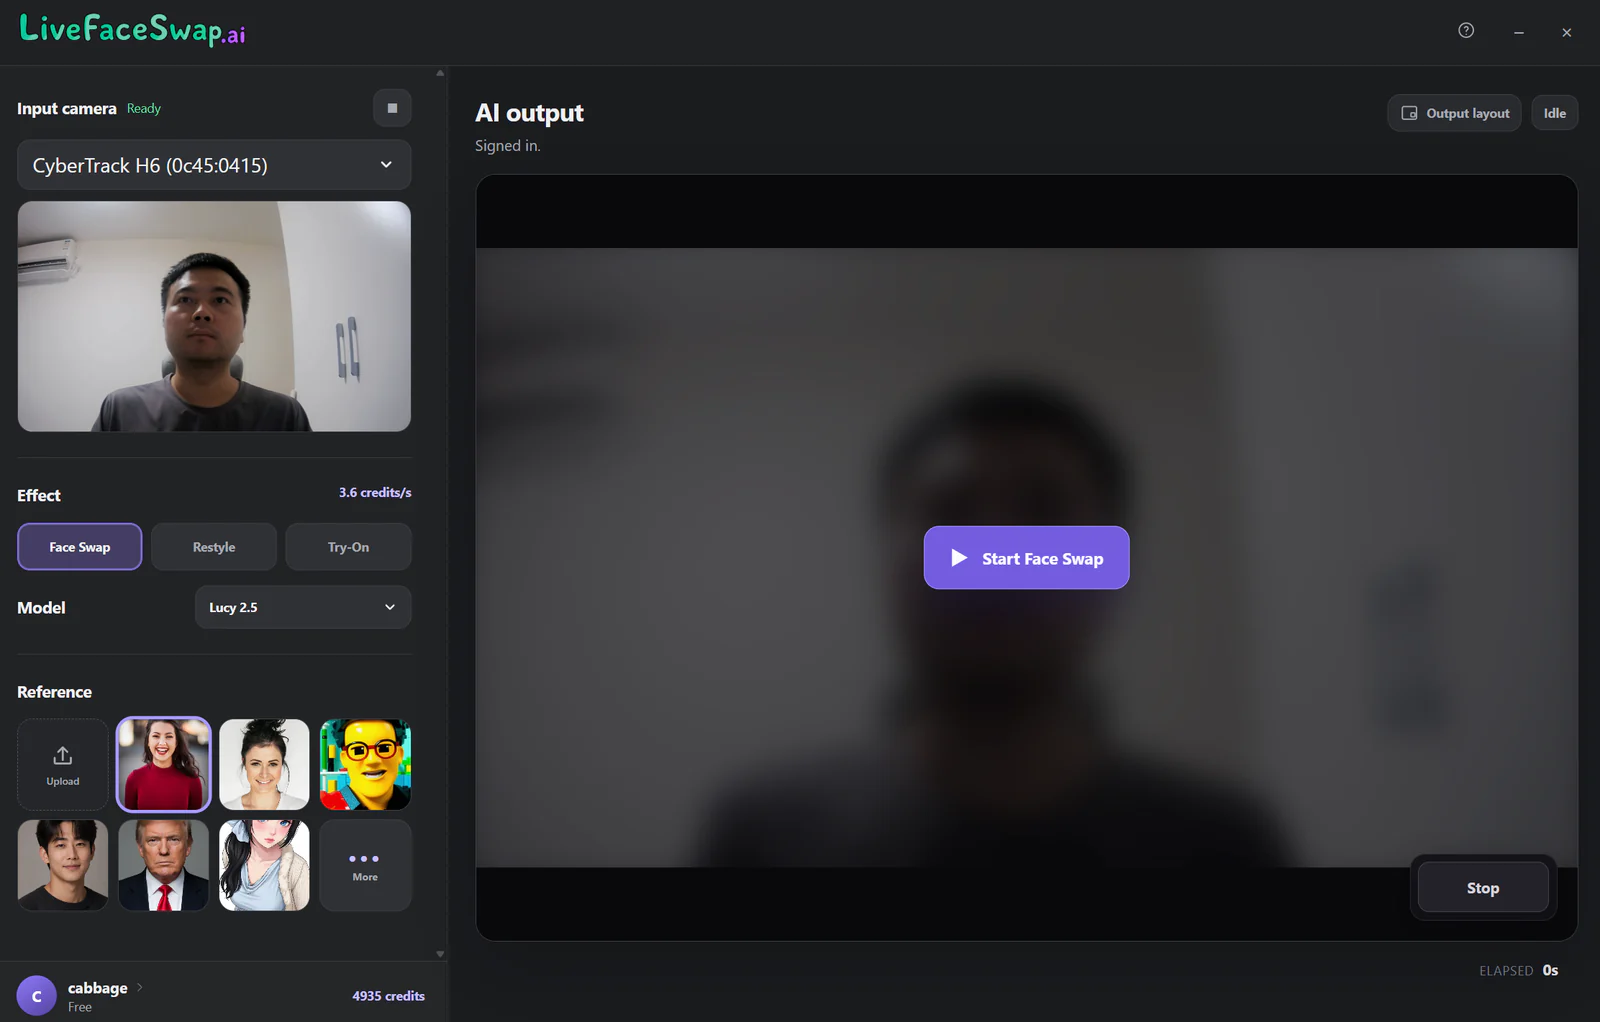
The desktop app and website use the same LiveFaceSwap account, including the same credit balance and plan benefits.
Click Sign in in the lower-left corner of the app. LiveFaceSwap will open an authorization page in your browser:
- If you are already signed in on the website, click Continue to LiveFaceSwap.
- If you are not signed in, sign in or create an account, then click Continue to LiveFaceSwap.
4. Choose the Face Swap Effect, AI Model, and Reference Image
Complete these settings before starting the real-time AI face swap:
- Under Input camera, confirm that the correct camera is selected.
- Under Effect, select Face Swap.
- Choose an available Model and check the displayed credit rate.
- Under Reference, upload a reference image or click More to select one from the gallery.
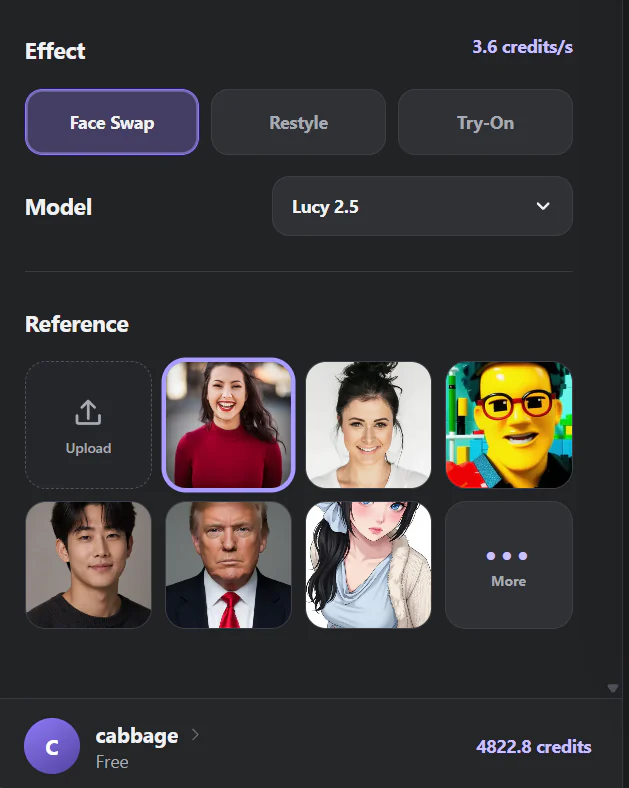
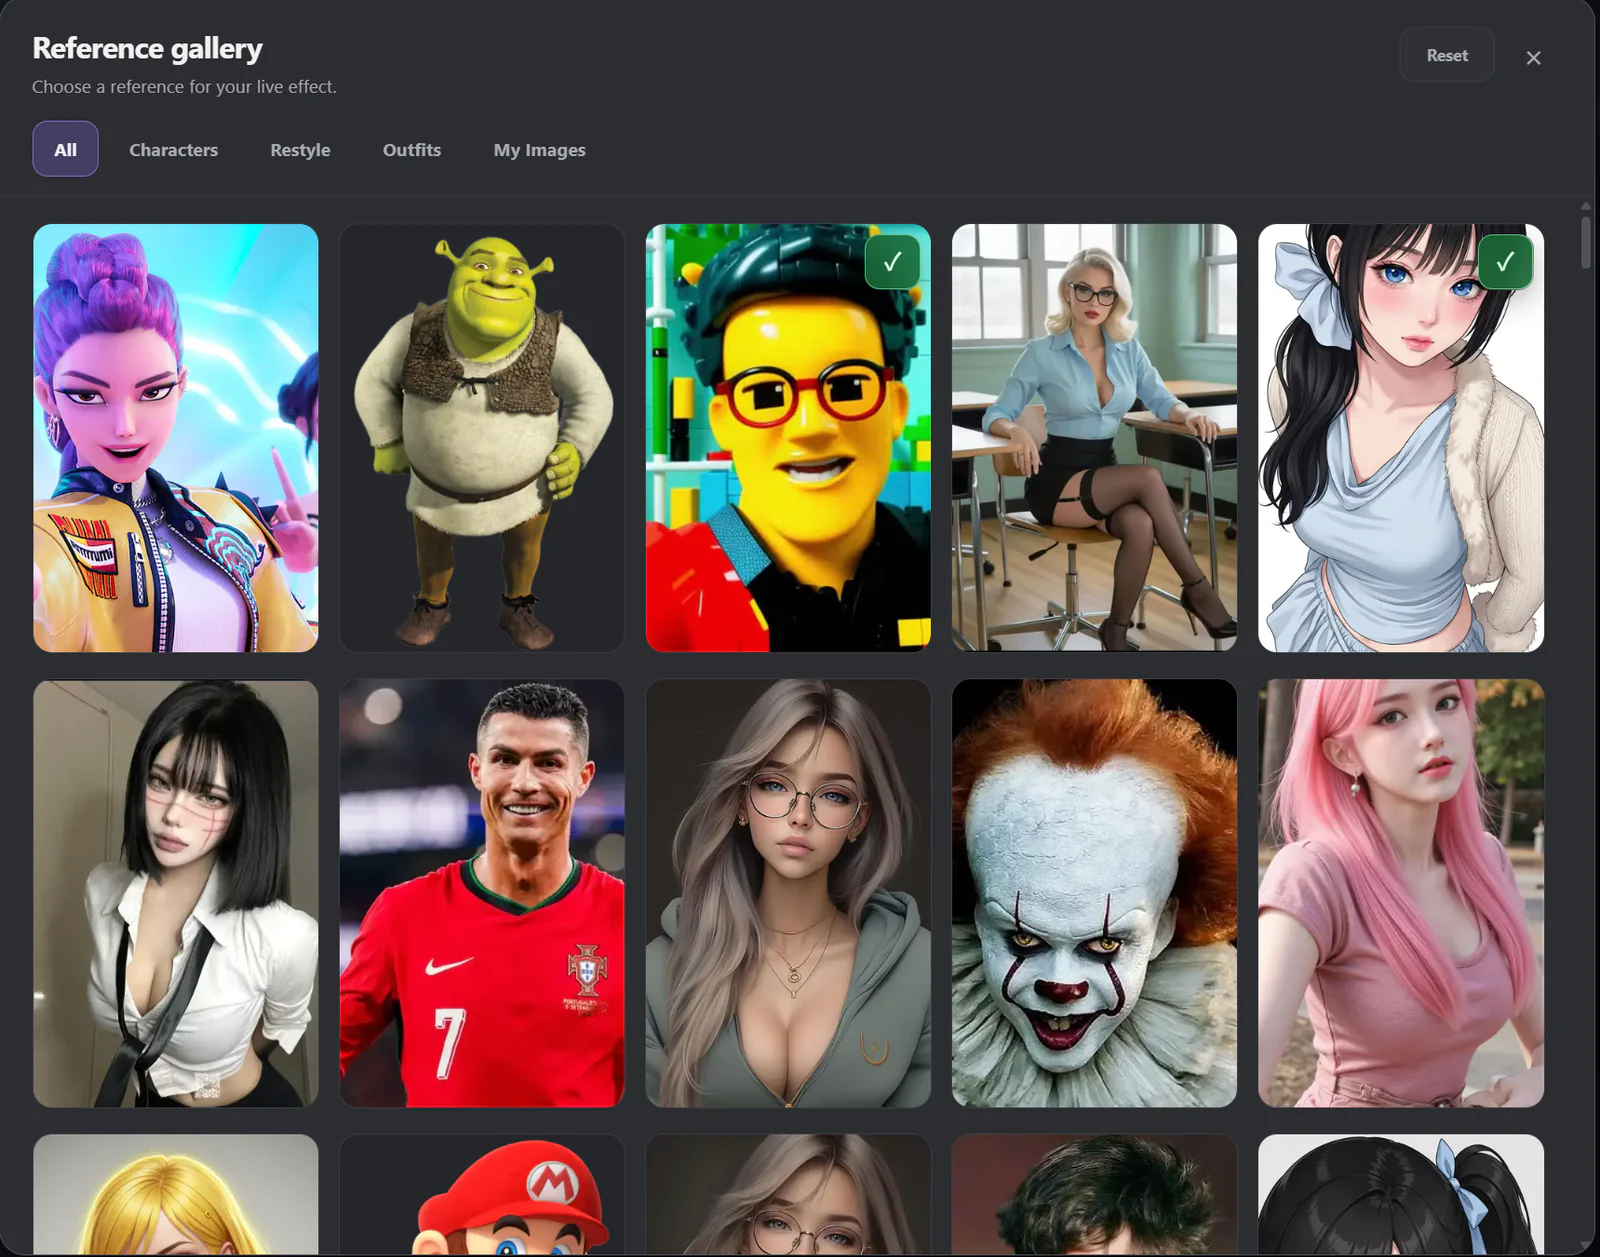
The reference image is used to generate the real-time AI output. For more consistent results, choose a clear, unobstructed portrait with even lighting.
For your first test, you can also leave the default settings unchanged.
5. Click Start Face Swap
After completing the setup, click Start Face Swap.
LiveFaceSwap will begin establishing a real-time AI session. Once any displayed wait has ended and the connection begins, the processed video will usually appear in the AI output panel after about 10–25 seconds.
You should be able to see both:
- The original camera input
- The real-time AI-processed output
When the AI output updates continuously as you move on camera, LiveFaceSwap Desktop is working correctly.
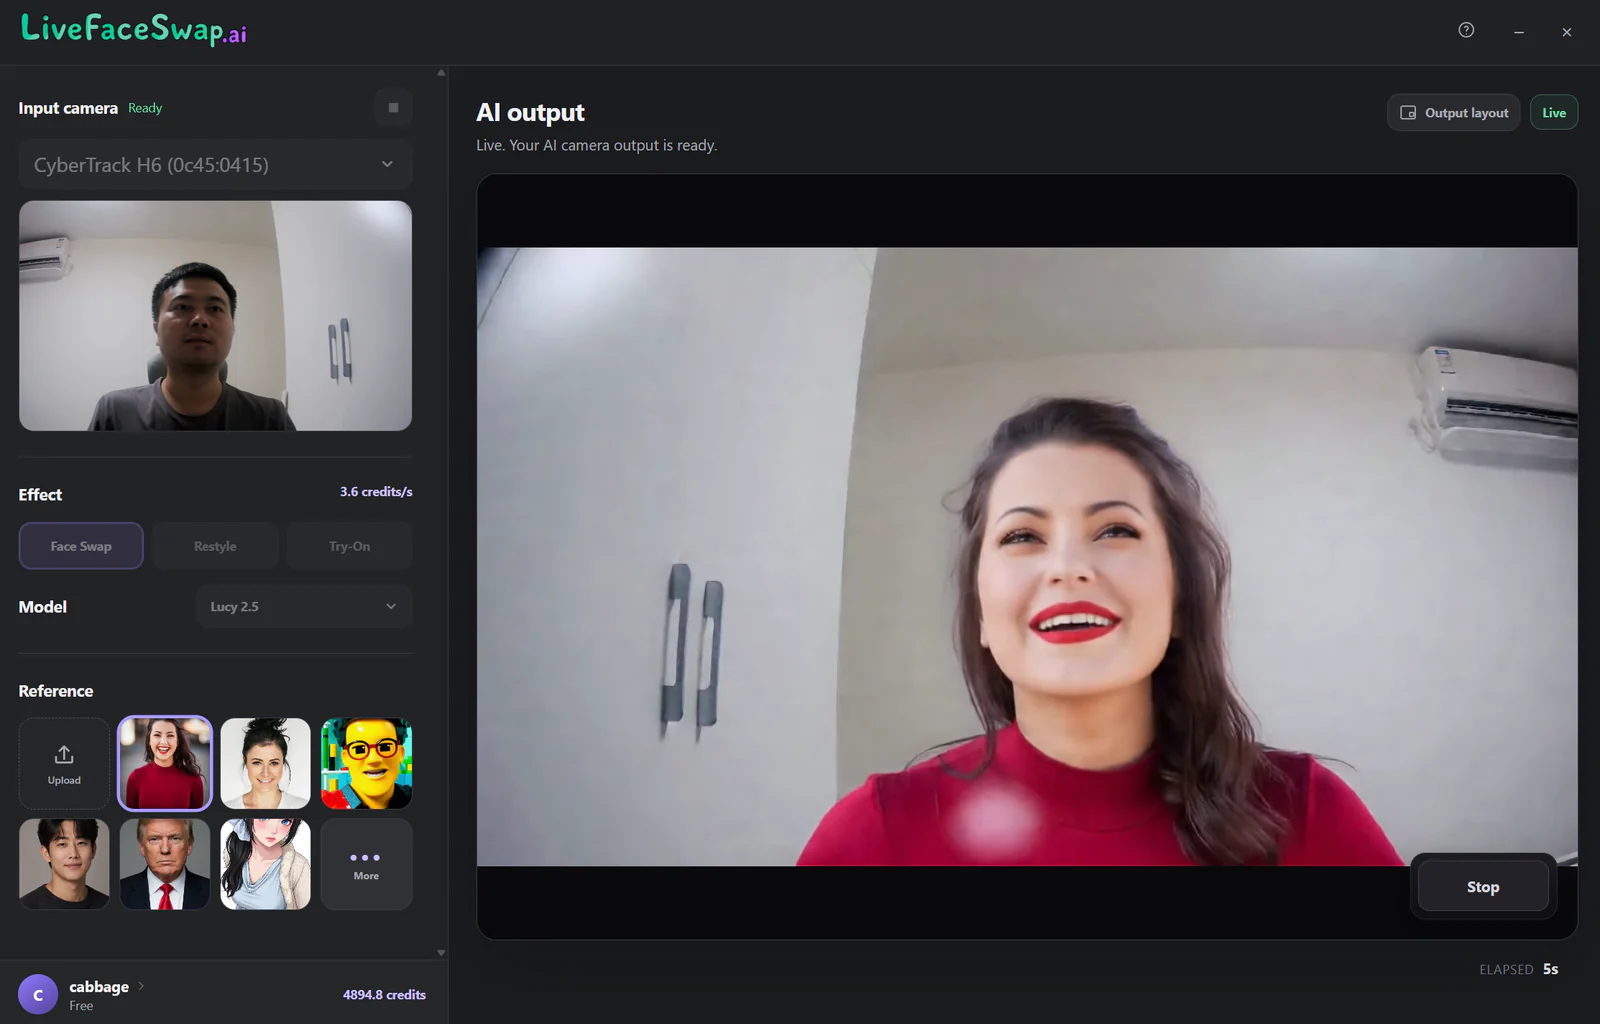
If the AI output is still blank for more than 60 seconds after any displayed wait has ended, click Stop first. Then try again or use the troubleshooting steps below to check your camera, reference image, model, and network connection.
Frequently Asked Questions
Does LiveFaceSwap for Windows Require a GPU?
No dedicated GPU or high-end graphics card is required. LiveFaceSwap Desktop can capture your camera feed and run a real-time AI session on Windows 11 without a dedicated local GPU setup.
Can I Use LiveFaceSwap on Windows Without Installing the App?
Yes. If you only need an interactive real-time face-swap preview in your browser, use the LiveFaceSwap online workspace.
If you need to send the AI-processed video to OBS, streaming software, or video conferencing software as a camera input, the Windows desktop app is the better option.
What Should I Do If LiveFaceSwap Cannot Access My Camera?
First, make sure the correct physical camera is selected under Input camera.
If the preview is still blank:
- In Windows Settings, confirm that LiveFaceSwap has permission to access the camera.
- Close any other apps that may be using the camera.
- Reconnect your USB camera, if applicable.
- Close and reopen LiveFaceSwap Desktop.
What Should I Do If There Is No AI Output After I Click Start Face Swap?
If the AI output is still blank for more than 60 seconds after any displayed wait has ended:
- Click Stop to end the current session.
- Confirm that the original camera preview is working.
- Make sure a reference image has been added under Reference.
- Confirm that an available AI model is selected.
- Check your network connection.
- Click Start Face Swap again.
After the session reconnects, the processed video should appear in the AI output panel.
How Do I View the LiveFaceSwap Desktop Logs?
If the problem keeps happening, open App & updates from the account menu and check for a newer version. Then select Open logs to open the local logs folder.
Email the log files, any error messages, and the steps that led to the problem to support@livefaceswap.ai. This information can help identify whether the issue is related to installation, the camera device, the AI session, or the network connection.
Next Step: Use LiveFaceSwap in OBS
After completing this guide, you should have a working real-time face swap in LiveFaceSwap Desktop on Windows.
Continue to the OBS guide if you want to:
- Record real-time face-swap video in OBS
- Stream the AI face-swap output to YouTube, Twitch, or another platform
- Add LiveFaceSwap as a video source in OBS
- Use the LiveFaceSwap Camera virtual camera